You can navigate to results of the failed tests from the TeamCity Watched Projects view. The test results are displayed in the TeamCity Failed Tests view that allows you to explore the test trace, filter out JUnit information, navigate to the test source files of the project in your workspace. From this view you can also start investigation of failed tests, or mark a failed test as fixed.
To view the results of failed tests
- In the TeamCity Watched Projects view, expand the desired project node and select the desired build configuration.
- In the properties section, right-click the desired build, and choose
View Failed Tests on the context menu.
The TeamCity Failed Tests view similar to the following screen is displayed: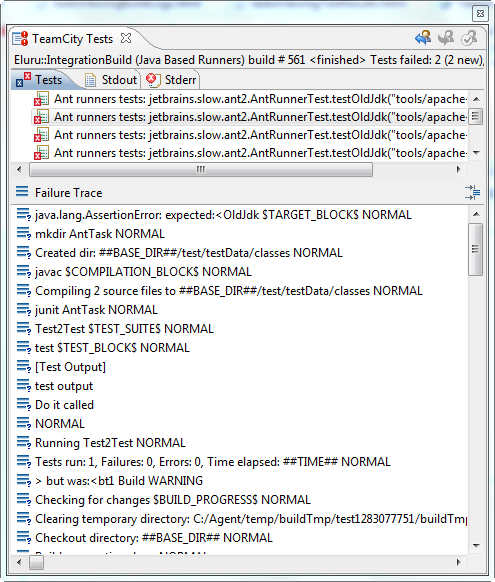
- To view detailed information on a failed test of interest, in the TeamCity Failed Tests view, do the following:
- In the Tests tab, select the failed test.
The test failure trace is displayed in the Failure Trace pane. - Optionally, to get additional information on the failed test, open the Stdout and Stderr tabs.
- Optionally, you can start investigation of a failed test, give up investigation or marked the failed test as fixed by clicking
 ,
,  , or
, or
 ,respectively, on the toolbar.
- In the Tests tab, select the failed test.
To navigate to the failed test source
- In the TeamCity Failed Tests view, right-click the desired test.
- On the context menu of the selection, choose Go to File.
To show or hide JUnit test information
- In the TeamCity Failed Tests view, select a test of interest.
- In the Failure Trace pane, click
 .
.